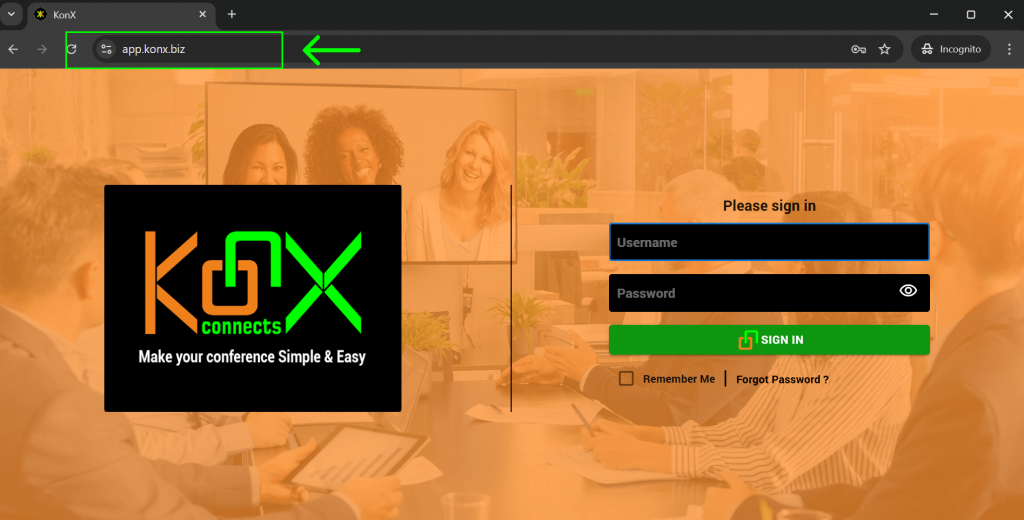
Click the Access KonX button, or directly type app.konx.biz into your browser.
Enter your email and password to log in to your dashboard.
Tip: Ensure your internet connection, camera, and microphone are working before starting.
2. Activating a License
To begin using KonX:
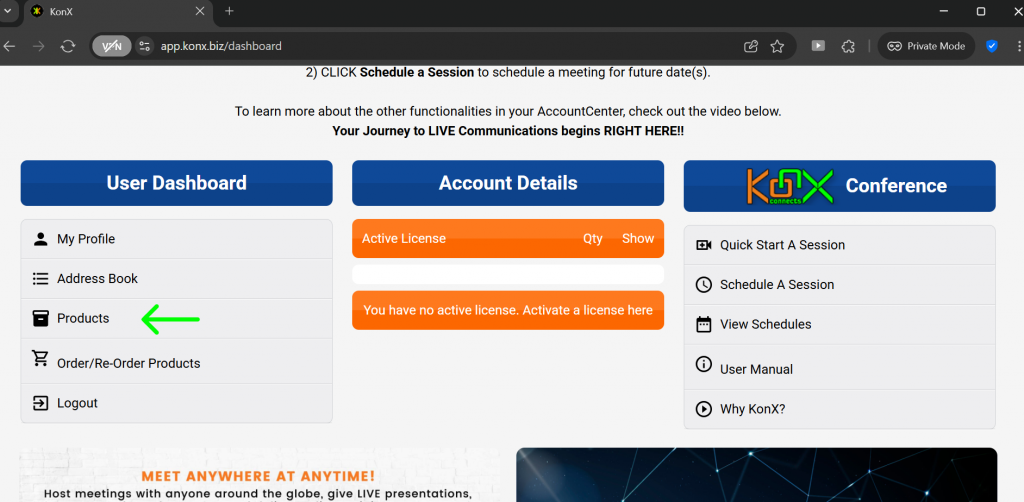
From the dashboard, click the Products button.
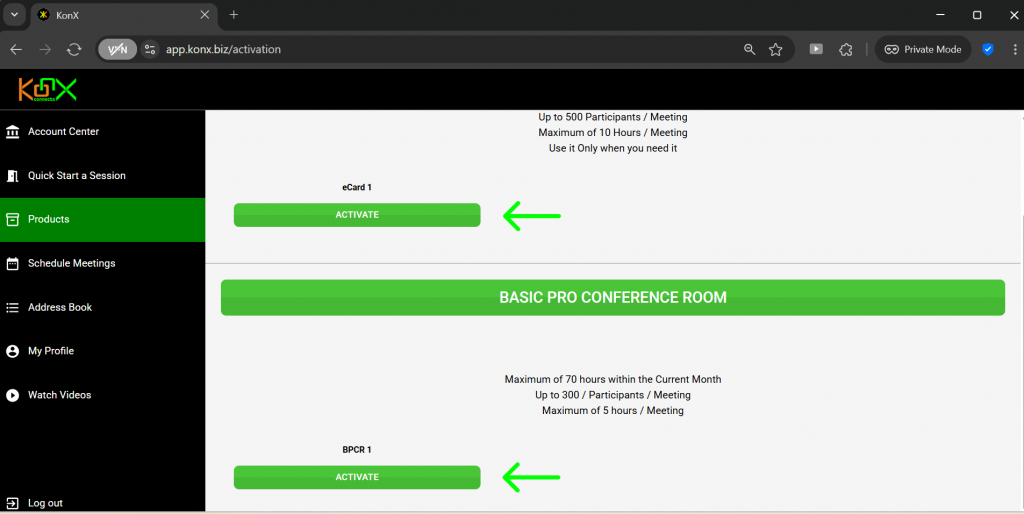
Select a subscription or eCard to activate.
Enter a name for your meeting room.
Click Create to activate your license.
3. Starting a Meeting
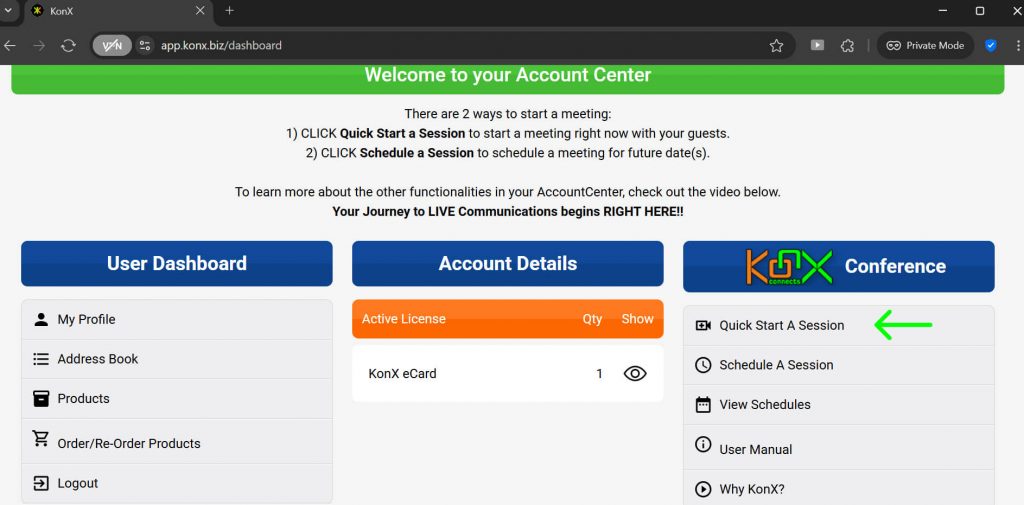
From the dashboard, click the Quick Start a Session button. This will launch a new meeting room where you can begin immediately.
4. Joining a Session
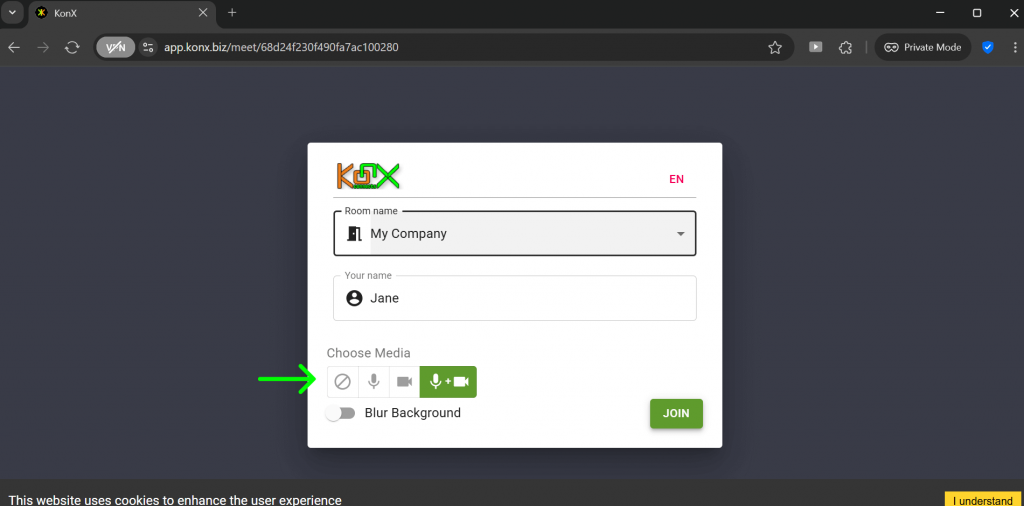
Choose whether to enable your microphone, camera, or both by clicking the buttons under Choose Media.
Enter your name.
Click Join.
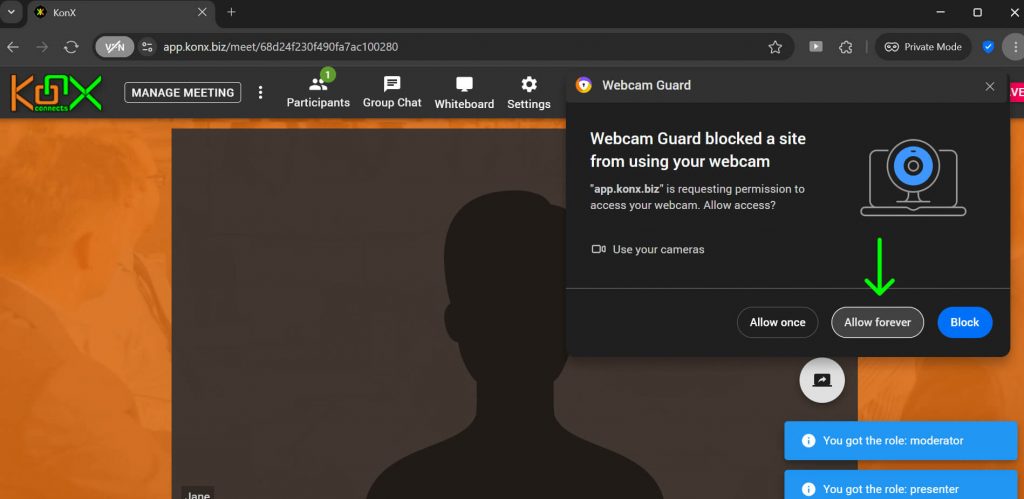
Important: If this is your first time, you will be prompted to allow KonX access to your camera and microphone. Select Allow on Every Visit or Allow Forever (for other browsers) for smoother participation in future sessions.
Troubleshooting Camera or Microphone Issues
Refresh your browser and try joining again.
Close your browser completely, then reopen and log back into KonX.
Clear your browser cache and attempt to rejoin.
If the issue persists, your browser may not support the required features. Try another supported browser, such as Avast or Opera.
5. KonX Conference Room
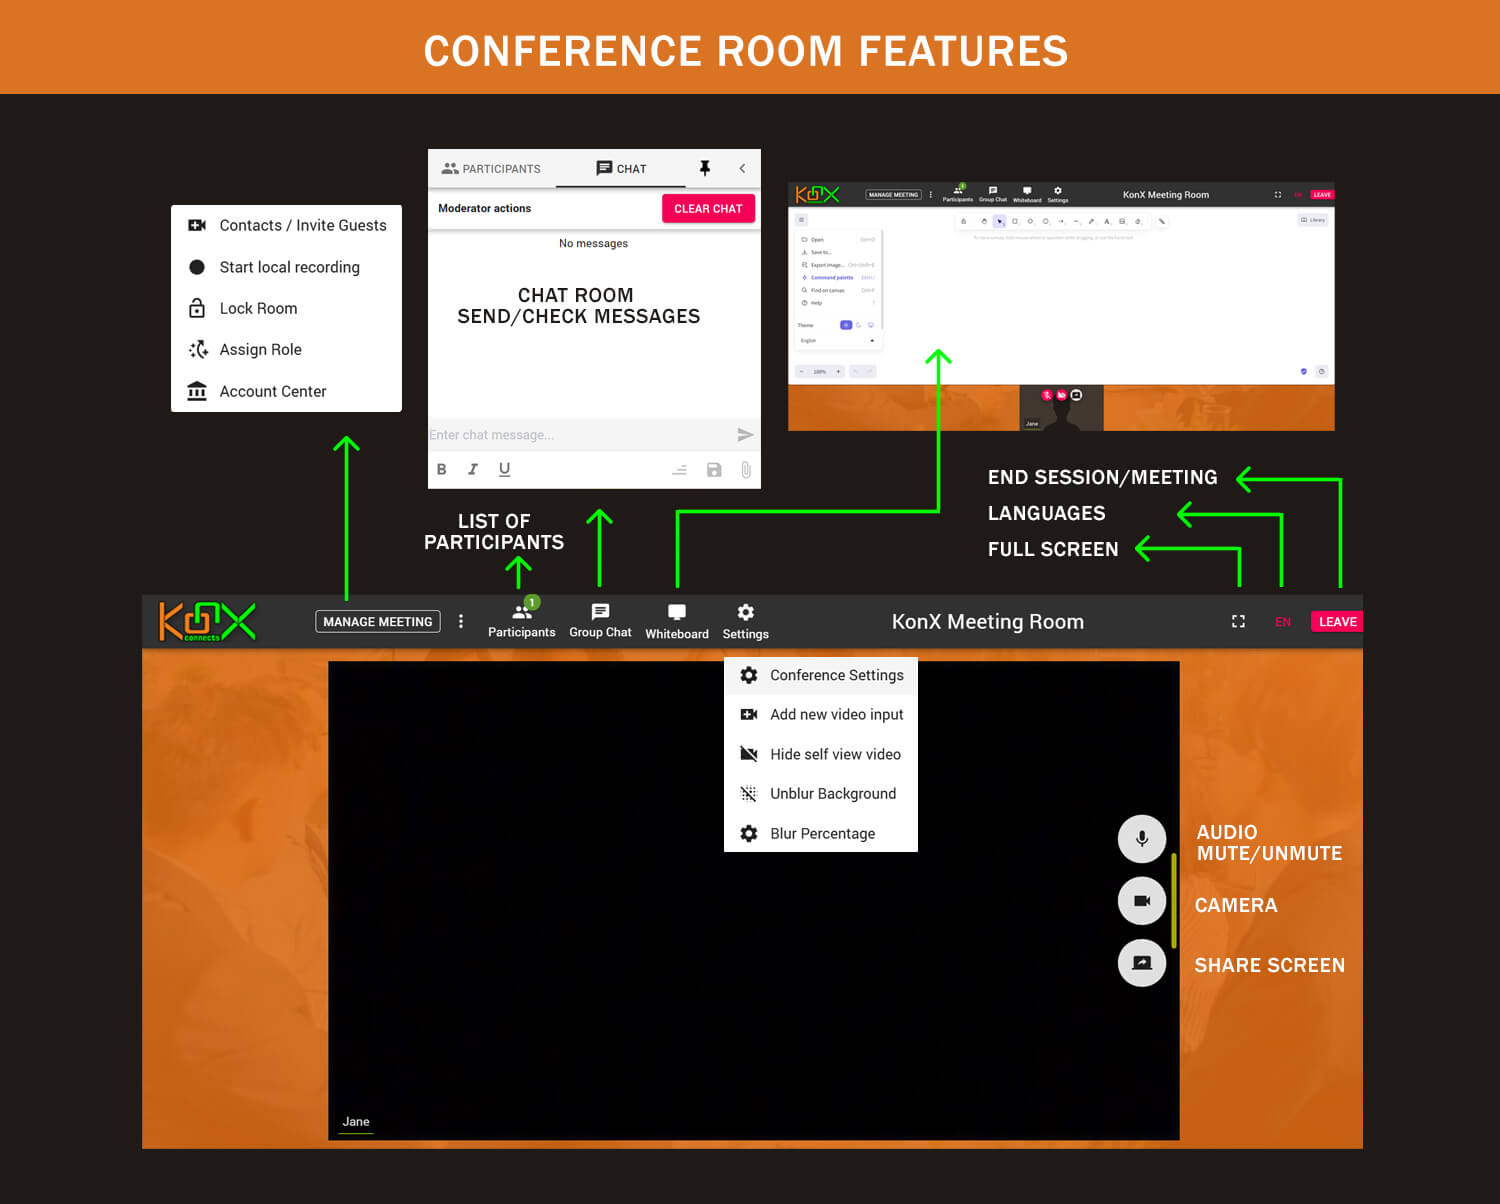
Mute audio: (shortcut: ‘M’ key or ‘Space bar’) Each Participant has to remember to mute the microphone – currently, it is not possible for the Host to mute everyone.
Stop video: Each Participant has to remember to turn on/off their own camera – currently, it is not possible for the Host to do this for everyone.
Share Screen: To start screen sharing, click the icon, then select what you wish to share and then click ‘Share’ (Chrome) / ‘Allow’ (Firefox). To Stop Screen Sharing, (if you are already sharing your screen), click the Green Screen Share icon.
6. Inviting Guests
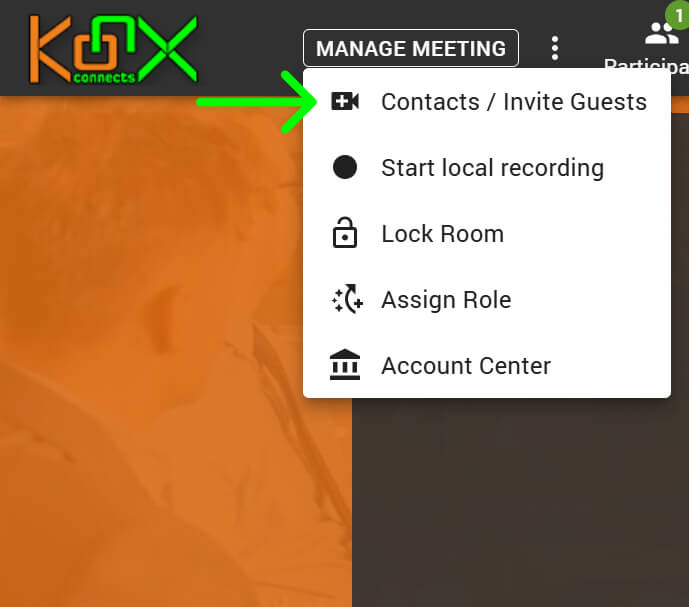
Click the Manage Meeting button located at the upper-left corner of the window.
Choose Contacts or click Invite Guests.
Enter the participant’s email address in the invitation box and click Invite. Guests will receive an email with the session link.
Alternatively, copy the meeting URL from the address bar and send it via your personal email.
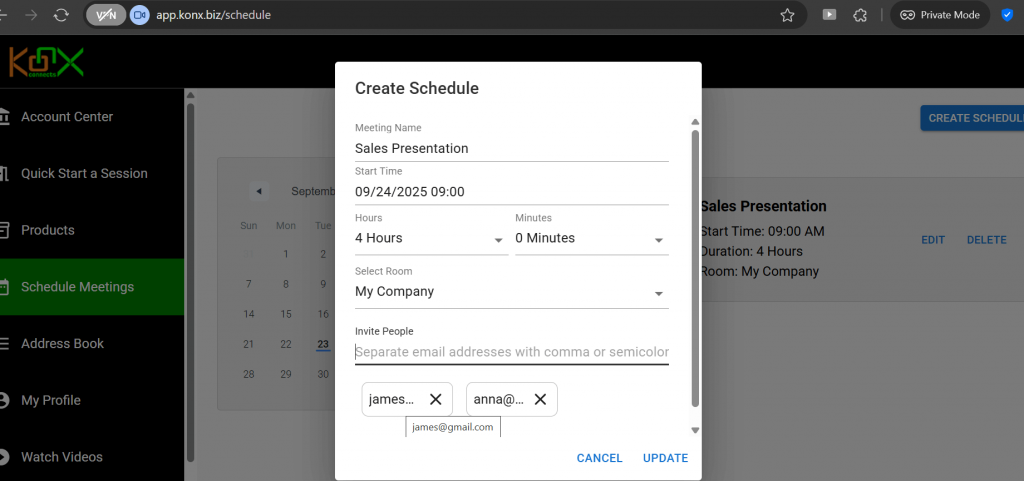
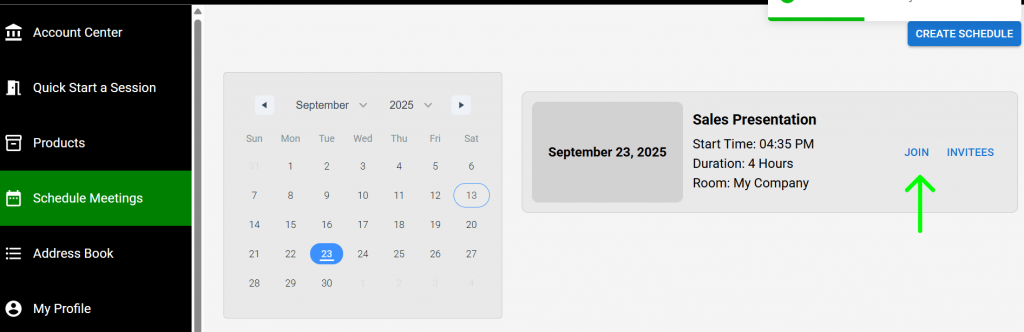
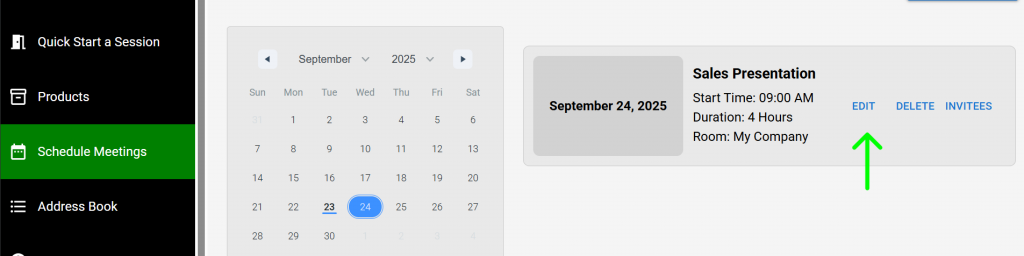
7. Scheduling a Session
From your dashboard, click the Schedule a Session button on the right-hand side.
Fill in the room name, date, time, duration, and invitee emails. Each time you type an email address and press comma, it will be added automatically.
Scheduled sessions will appear in your calendar.
Click the Invitees button to view the participants you’ve invited.
Note: Note: The date and time shown in your dashboard follow your local timezone, but the schedule sent to your guests is displayed in PDT (Pacific Daylight Time).
The session/meeting link for a scheduled session expires after the set timeframe. The session can continue, but no additional guests will be able to join.
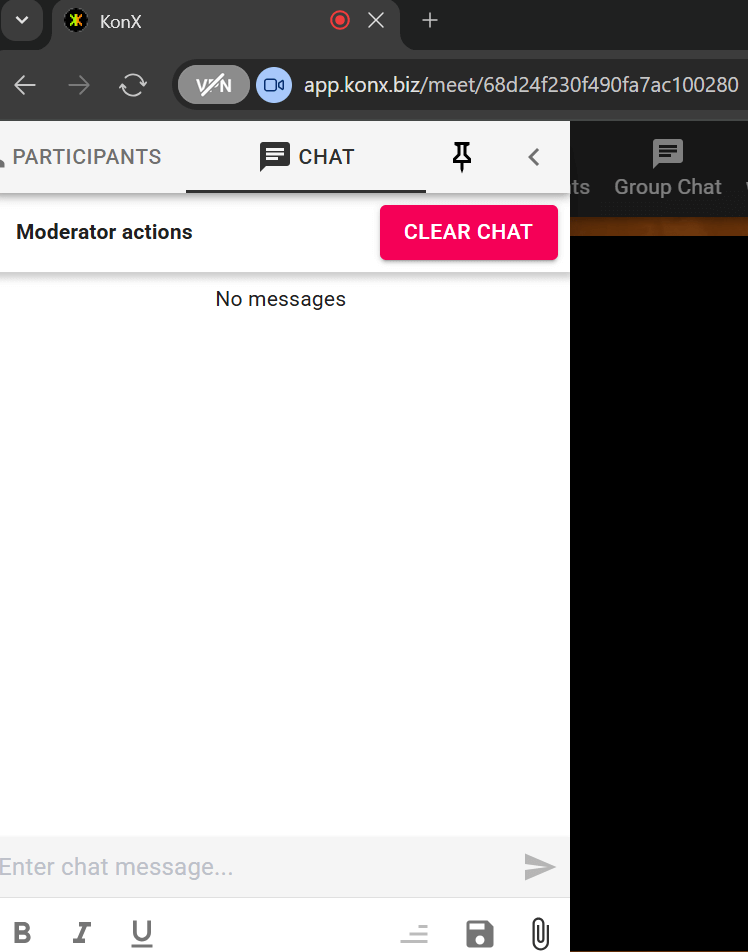
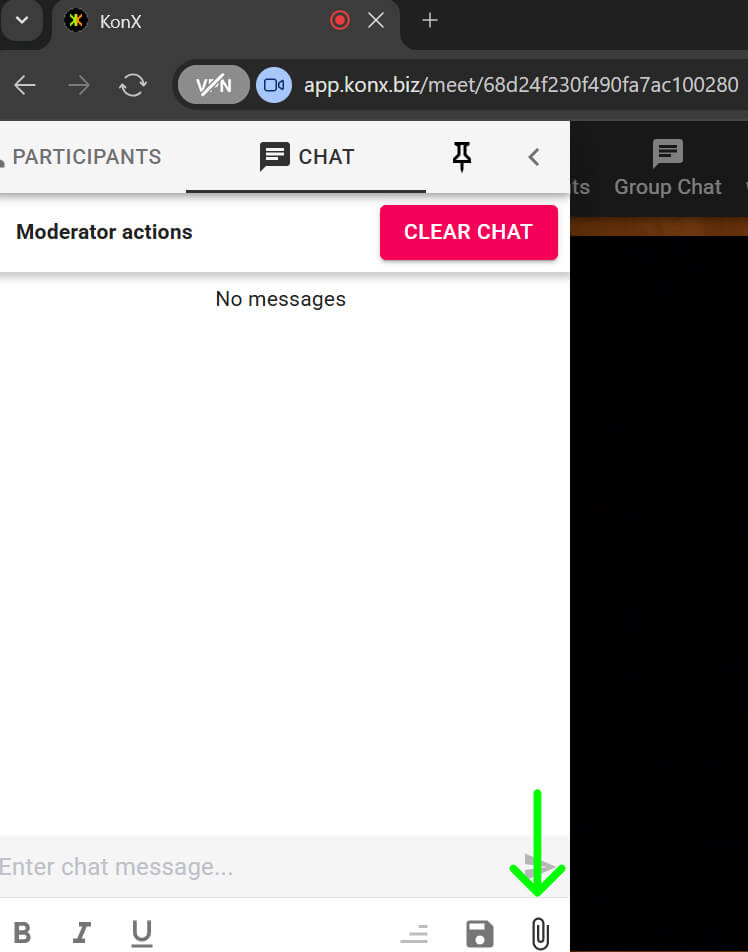
8. Chat and File Sharing
Use the Group Chat to send text messages during the session.
To share files, click the Share File button at the lower-right corner of the chat box. Select the file you want to send. The file will appear in the chat for participants to access
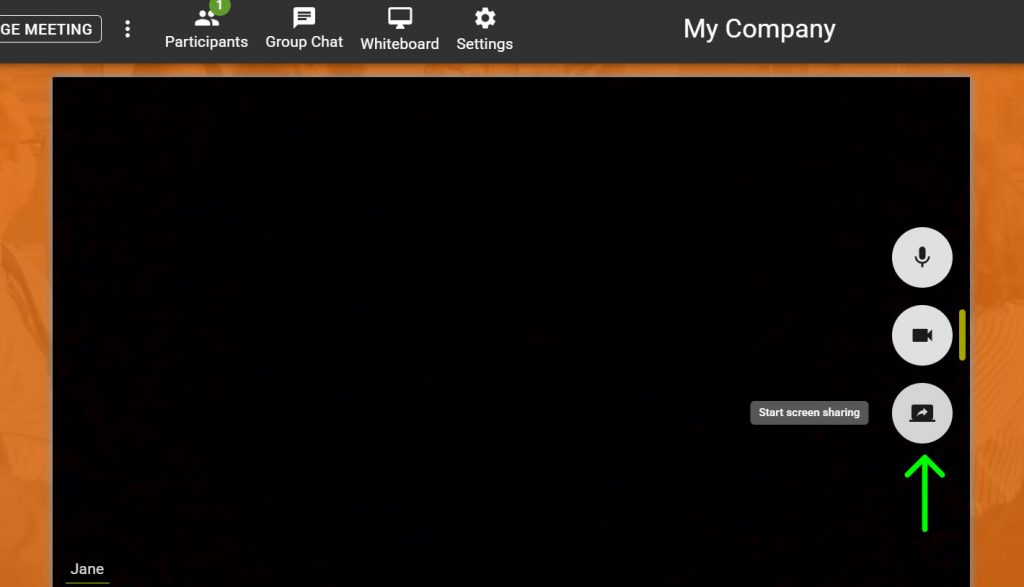
9. Screen Sharing
Click the Start Sharing button on the right side of your video feed.
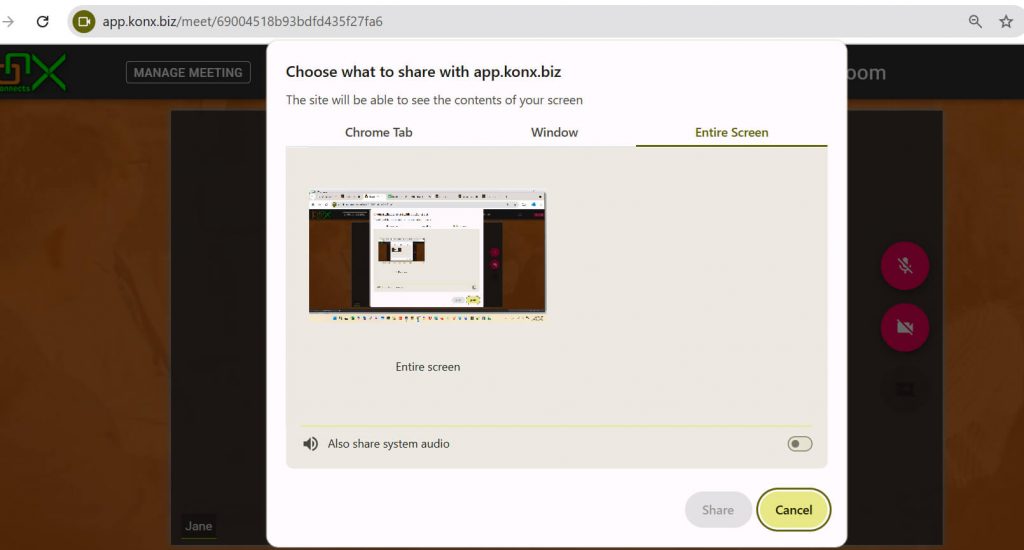
Select whether to share a Tab, Window, or Entire Screen.
Click Share to begin.
Click the Full Screen button at the bottom of the shared screen to expand the view.
Note:
Tab – Shares only the selected browser tab.
Window – Shares an entire application window. If the window is a browser, you can switch between its tabs.
Entire Screen – Shares your full desktop, including all applications and actions.
10. Managing Participants
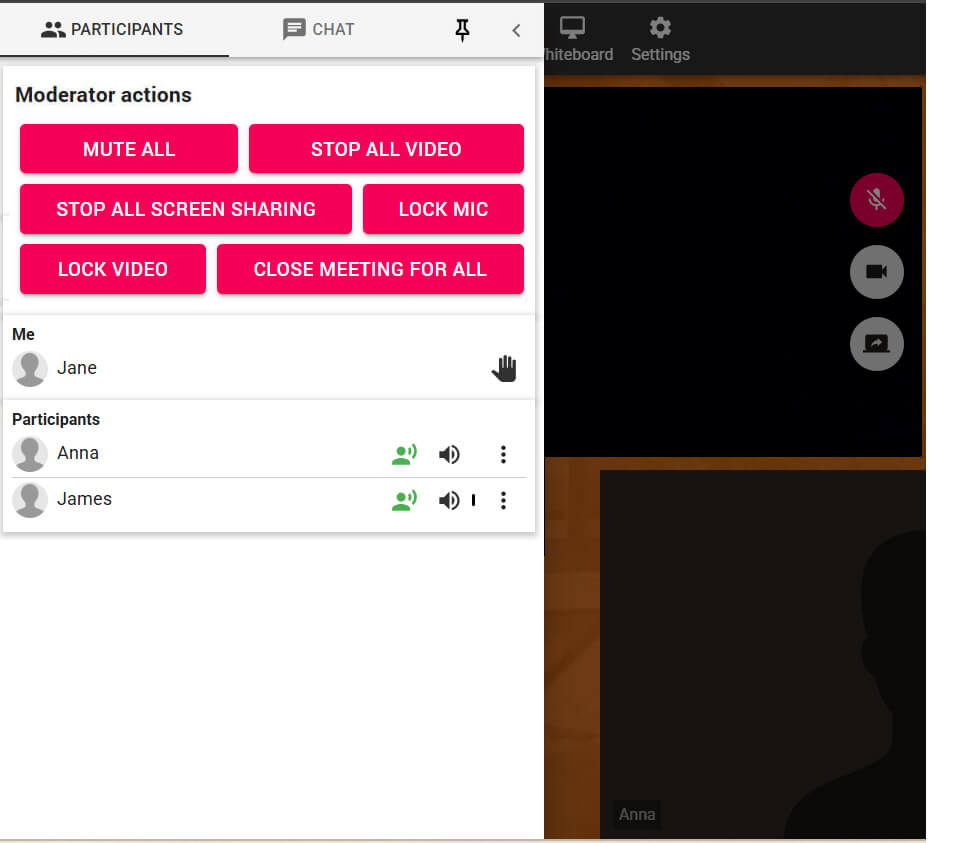
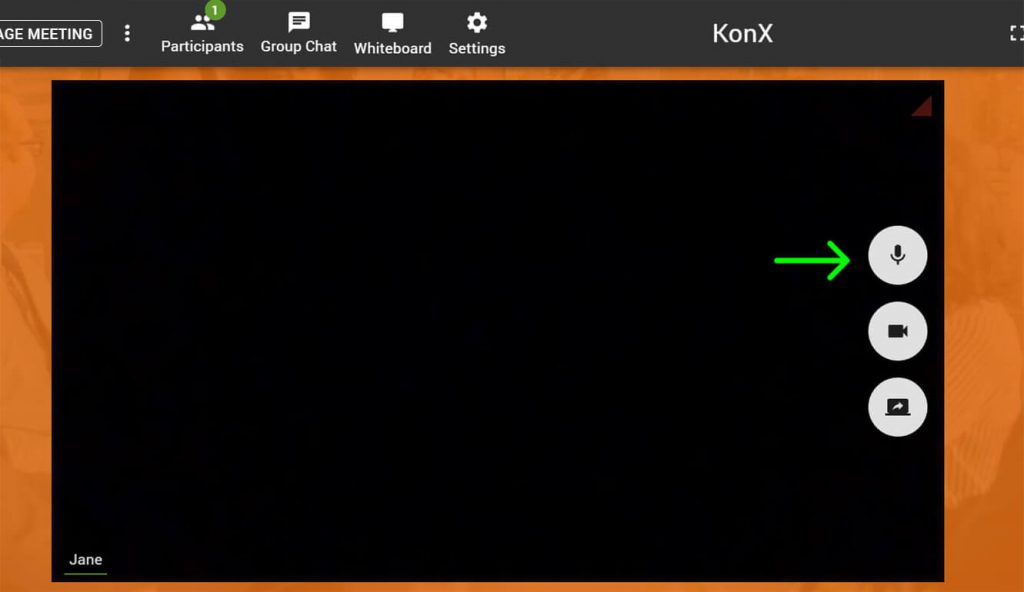
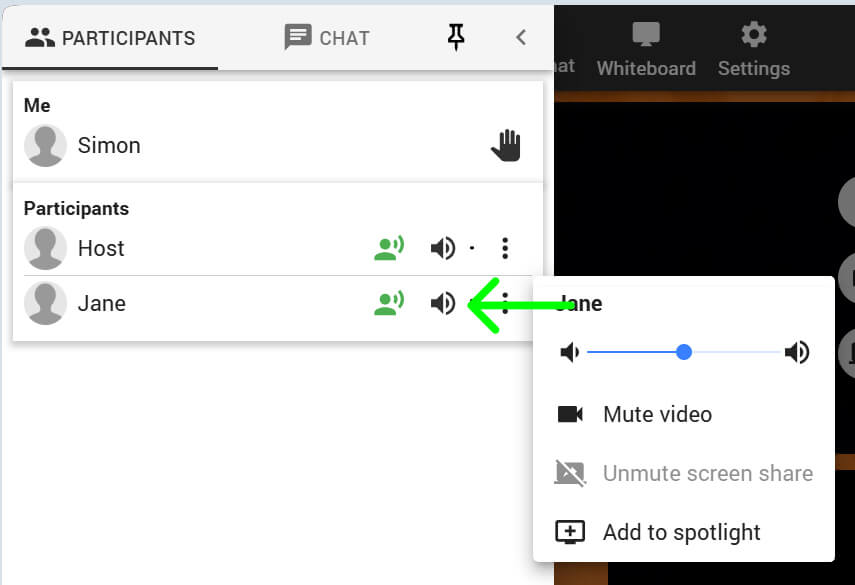
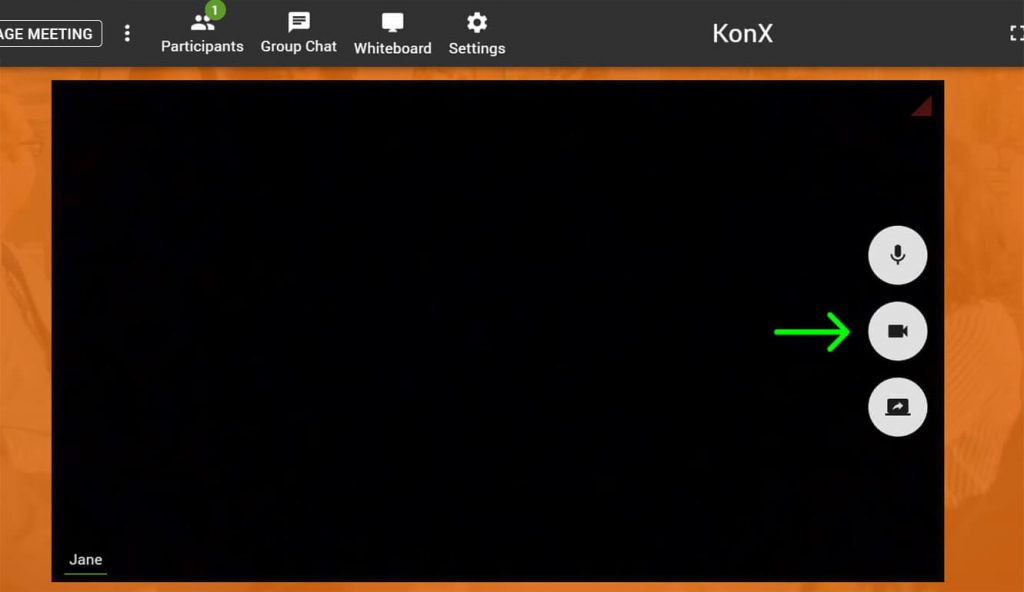
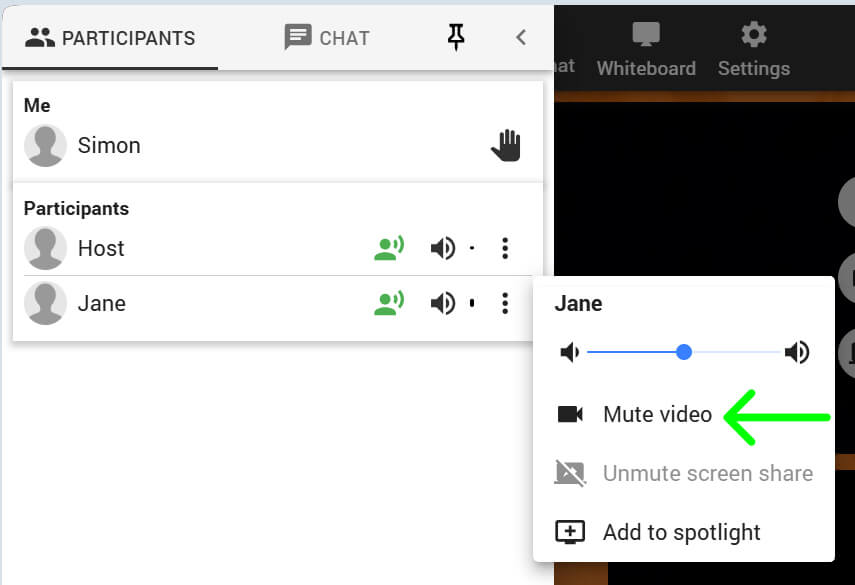
View the list of participants by clicking the Participants button.
Participants can mute or disable/enable another participant’s audio or camera, but these actions only apply to their own view.
To mute a participant’s audio, click the Audio button on their screen or open the Participants list, find their name, and click the Audio button. Click again to unmute.
To disable a participant’s camera, click the Video button on their screen or go to the Participants list, click the three-dot menu next to their name, and select Mute Video.
As a host or moderator, you can mute or unmute participants’ audio and stop or enable their video for all participants. This helps reduce background noise and distractions, allowing guests to focus on the speaker.
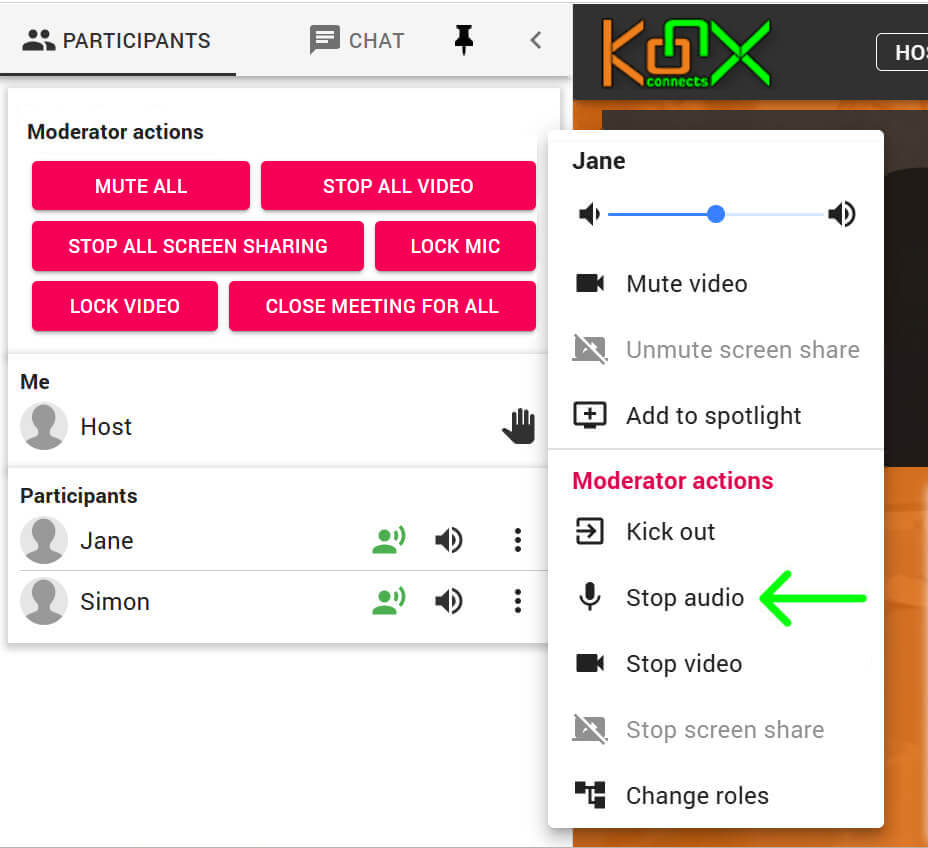
To mute a participant’s audio: Go to the Participants list, find their name, click the 3-dot button, and select Stop Audio under Moderator Actions.
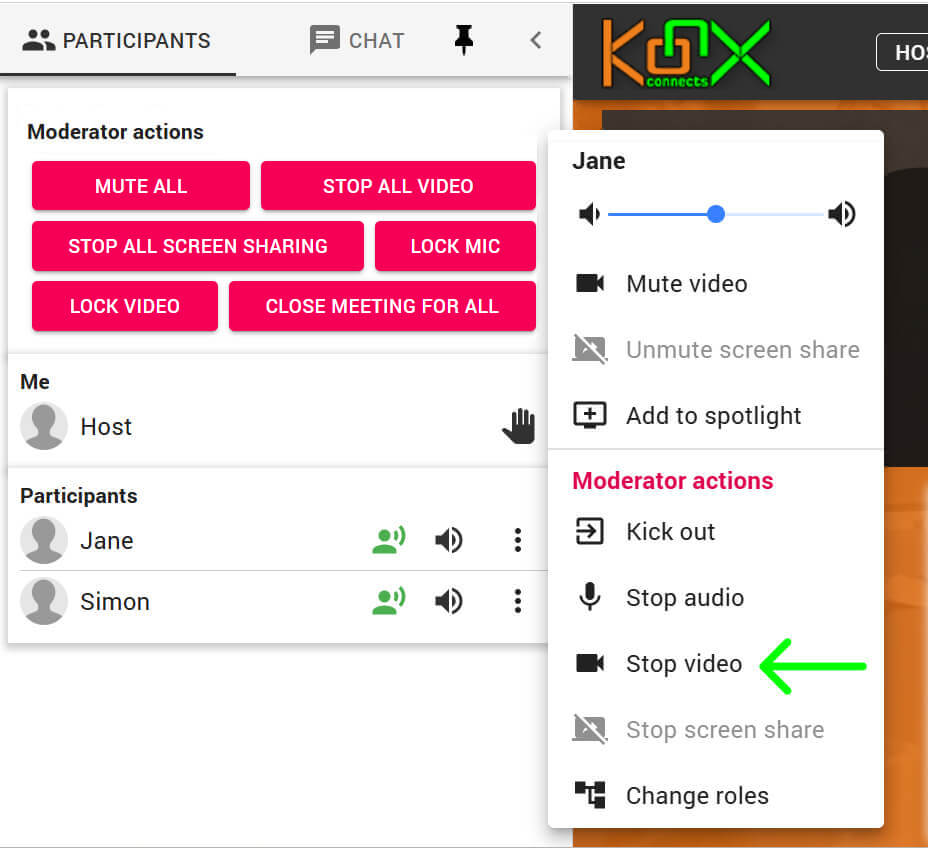
To stop a participant’s video: Go to the Participants list, find their name, click the 3-dot button, and select Stop Video under Moderator Controls.
To disable all participants’ microphones and prevent them from turning them back on, click the Lock Mic button.
To disable all participants’ video/camera and prevent them from turning them back on, click the Lock Video button.
11. Assigning Roles
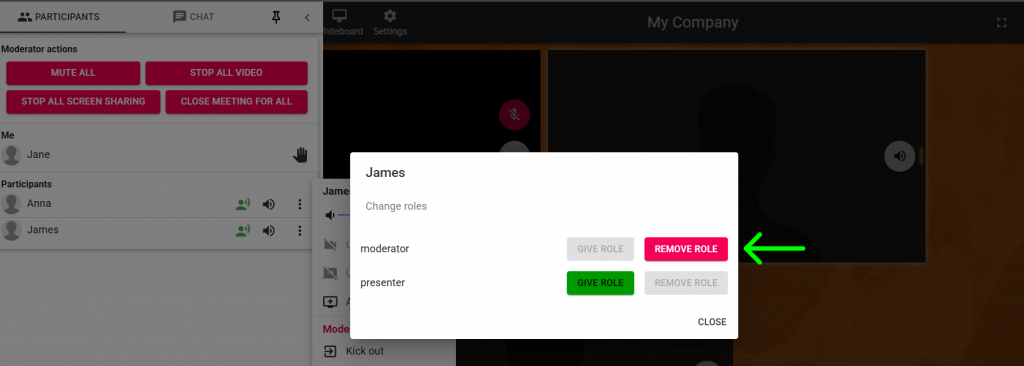
Open the Participants list.
Locate the participant and click the three-dot menu beside their name.
Select Change Roles.
Available Roles
Moderator: Can remove users, stop audio/video, and manage screen sharing.
Presenter: Keeps the participant’s video visible to all viewers.
12. Whiteboard
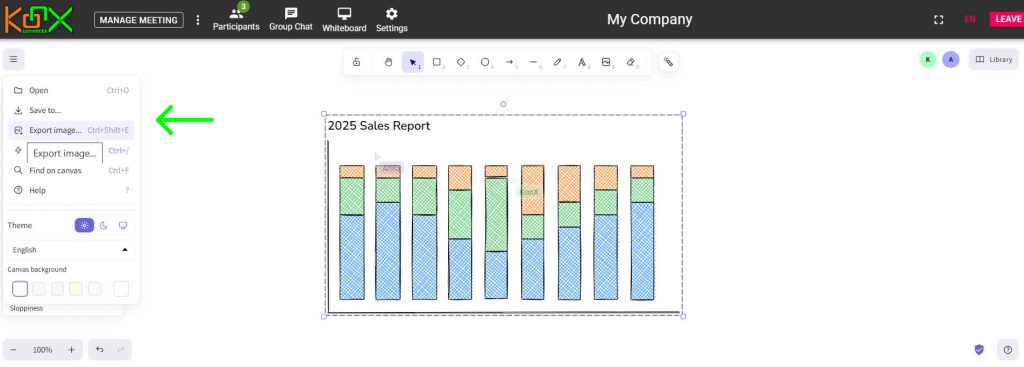
Click the Whiteboard button in the top menu.
Use tools to add shapes, lines, text, and images.
Use the Pen Tool for freehand drawing.
Resize elements by dragging their corners.
Adjust properties (color, stroke width, font, background) from the left panel.
Saving Whiteboard Work
Save as a file to keep it editable for future use.
Save as an image for easy sharing.
Use the Load button to re-import files.
Tip:
Tip: Save as an image if you want to share it with others. Save as a file if you plan to edit it later.
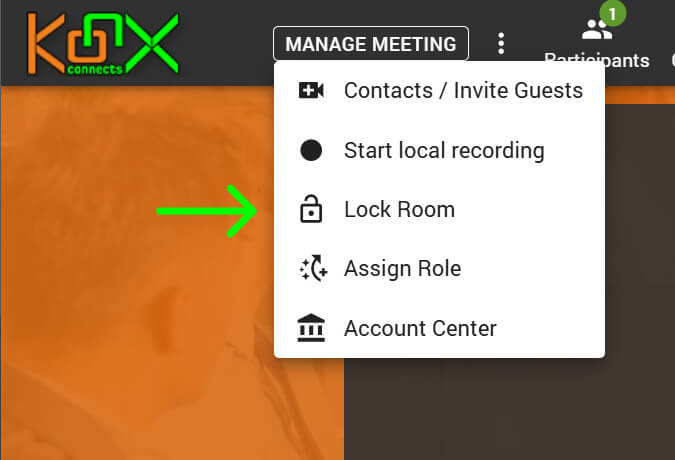
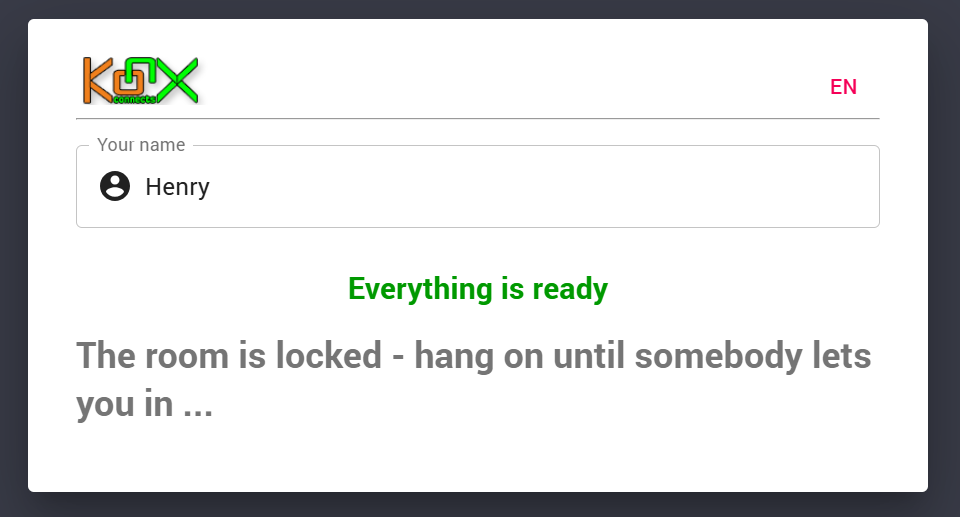
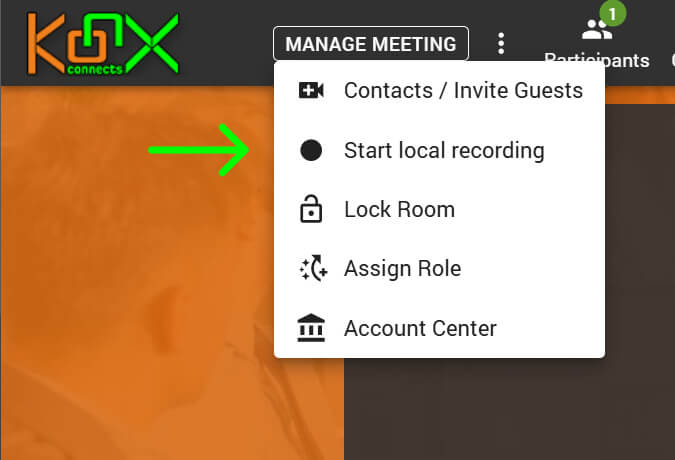
13. Locking the Room
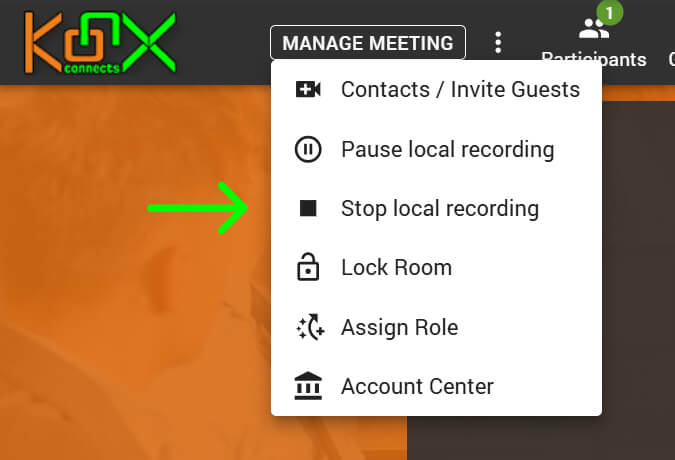
To restrict access, select Lock Room from the Manage Meeting menu.
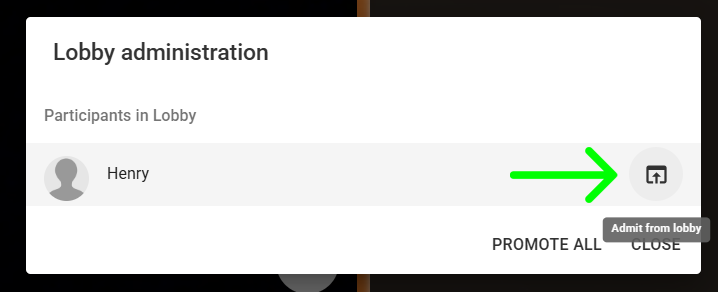
New participants will be placed in the lobby until a moderator admits them.
Moderators can admit users individuall or admit all waiting participants at once.
14. Recording Sessions
From the Manage Meeting menu, click Start Local Recording.
A red dot will appear in the upper-right corner, indicating recording has started.
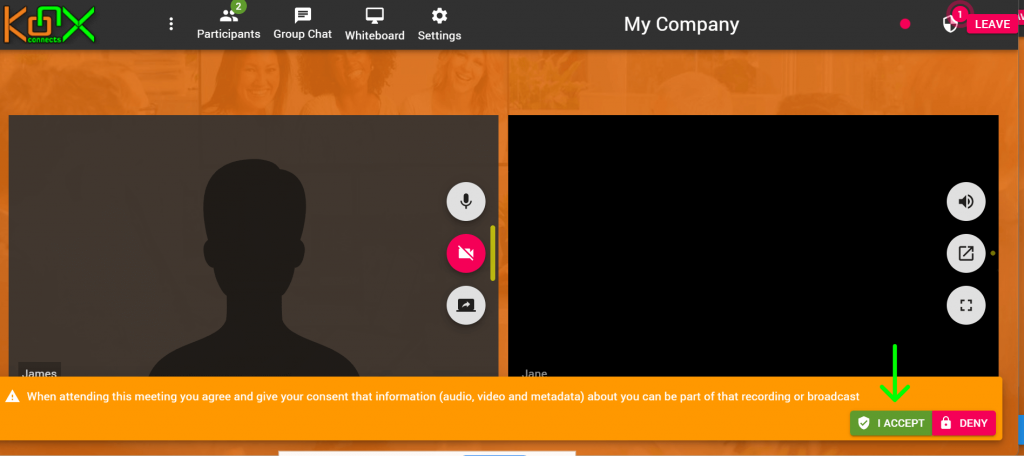
Participants will be prompted to allow or deny recording of their audio/video. If denied, their streams will not be recorded.
To end recording, click Stop Local Recording. The video will automatically download to your computer.
15. Leaving a Session
To leave the session, click the Leave button at the upper-right corner of the window.